Wednesday, February 23, 2011

Glassblowing Open House

McFadden Art Glass had an open house last Friday and I took my parents.  It was a great time and my dad got to make an ornament!
 Here he is shaping his glass while I wait to blow in the pipe.
 Here he and Tim add the loop on the top.
My friend came as well and got to make a pendant!  The open house is such a great opportunity for anyone to come in and get a taste of glassblowing.
Here's Dad's finished ornament!  What a pro!

Thursday, February 17, 2011

Dying Printed Forms

I had some RIT dye lying around from a previous project and thought I'd see how the Shapeways WSF material took the color.
 This is one of my spindle necklaces that I dyed using the teal dye.  I stuck the pendant in when the dye was hot and fresh and let it get to a nice deep shade.  I put the cording in shortly after to see if it would take color as well.  Magically, it did!  This is a wonderful way to match your printed piece to its cording!
This is a nice, classy color.
 This one is my favorite.  It's dyed using the tangerine color.  I put it in fresh and let it sit for a while to get a nice saturated orange.  It's a really fun piece.
I like how the cording doesn't dye as easily so it is always slightly lighter than the printed piece.  It makes a very nice, balanced piece.
 This one was dyed using the same teal dye but I let the dye cool slightly and only stuck it in for a short amount of time.  It made a really nice robin's egg blue.
The WSF material is so porous and durable that it makes dying an ease.  It looks lovely without any dye but is so versatile if you want color.  Coupled with the clear soft glass cording, these necklaces are a dream to dye.  Expect more experiments to come!  I need to order some more prints!

Thursday, February 10, 2011

Spindle Necklaces

My Shapeways order came today!  It feels like Christmas every time I see that cute little white box at my door.  I made a series of spindle necklaces over the break and got a few printed as a beginning of the semester gift to myself.  Here is the first in the series (and my favorite).  Available for order at my Shapeways Shop here.
 I thought the textures and aesthetics of the SWF printing material and soft glass tubing went well together so I tried to design a necklace that combined the two into something cohesive.
 This is a close up of the pendant.  I designed two hollow balls, suspended in the center of the caged piece, with holes cut such that the tubing runs through them and holds them up against the top of their cages.
The 2.5mm soft glass tubing is available through Polymer Clay Express in a variety of colors and sizes.  I am in love with the stuff.  It is so durable and comfortable and you can purchase simple connectors that make lovely friction clasps.  I designed my own to go along with this piece as the only ones available are metal and don't reflect the aesthetics of the pendant.  They also are only for one strand and I wanted to use three.
This is the second necklace in the series, which is just a simplified version of the first spindle.  It only uses one strand of soft glass but I designed the connectors for this in the printed material as well.  I only printed these two pieces in the series to test out their success with the tubing.
This is a piece I designed a while ago.  It obviously inspired the caging for the spindle pieces and I edited the design and got it printed again because my original batch had an issue with one of the balls fusing to a cage bar.  Despite that, they sold out fairly quickly at the Metals Club winter sale so I'm pretty confident in the consumer appeal of the design.  The caging reduces the material cost so I can sell them fairly cheaply.

Getting these pieces printed made me see the beauty in the connectors designed to fit the tubing.  My next project is to investigate combining different connectors with the tubing to make a series of bracelets.  Fun fun!

Tuesday, February 8, 2011

Adventures in Glassblowing!!

Today was the fist day of glassblowing studio!  We learned the basics of how to hold the pole and standard safety and then practiced making simple solid marbles.  It was a fantastic terrifying time.  It was rough at the beginning but we all eventually got the hang of it.
 This is the studio pup, Erin!  She's a complete sweetheart.  Look at those gorgeous doe-eyes.
 This is Jess shaping her first marble with the aid of Savannah.  Exciting times.
 Here's Jess heating her third try in the "glory hole."  I picked up none of the terminology other than this one term.
This is me shaping one of my marbles (I use that word loosely.  They were more like glass mushrooms).

 Here's Savannah loading up our poles with molten glass (notice I didn't remember a bit of the terminology for this part).
Here is my first marble attempt!  Let this be known as my first piece of glass ever manipulated!  In case I become a famous glassblower one day (not likely).
Attempt #2!  Miles above the first one.  This one didn't have a ripple in it and somewhat resembled a sphere.
The bar next door!  What a wonderful idea!  We finished up our marbles and headed over to the bar for a beer and some crab fries.  Excellent end to the evening.
Crab fries!  So bad but so good.
There was a birthday party going on at the same time and a couple drunk guys stumbled over and plopped cake onto our table.  It was actually delicious.  So my night consisted of molten glass, a lovely dog, great beer, crab fries, and cake.  I'd call that a successful Tuesday.

Monday, February 7, 2011

Portfolio Website

I've recently created a portfolio website to refer people who are interested in what I do.  Check it out here!

Start of a New Semester! Cuttlefish Casting

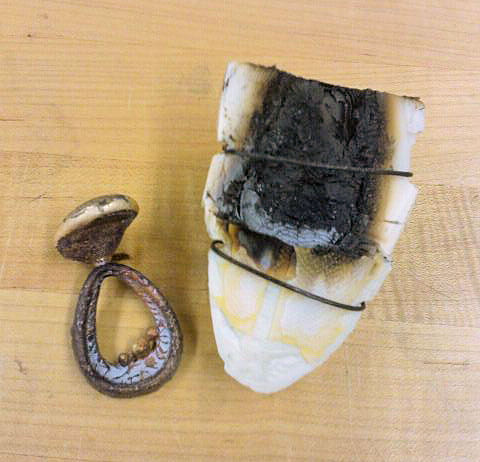
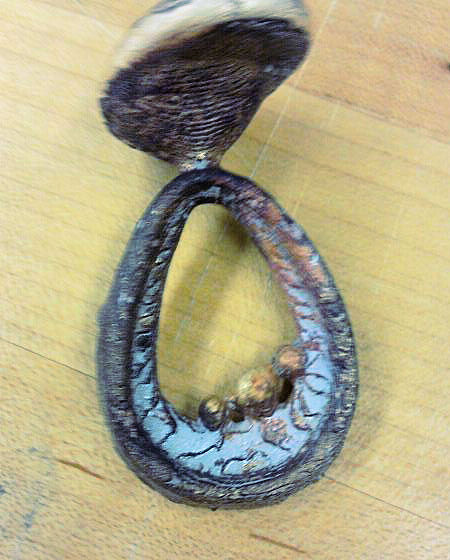
Today I had my first metal casting experience!  We carved and poured cuttlefish bone molds which, by the way, smell dreadful when burning.  It was a one-shot process and I am pleased with my results.  Here is my first bronze casting!
 This image is thanks to Lindsay Fortier.
 My burnt up mold and cast piece.
It needs a bit of cleaning and to remove the sprue but I'm fairly happy with it.  It was a fun intro to casting.

Thursday, December 9, 2010

A Tale of 4 Rings: Day 4

Day 4: Stock

I found this material to be the most difficult to work with.  Sawing took ages and so did every other means of manipulation.  My only thoughts going in to this project was that I wanted to form the stock using alternating levels of brass and copper sheet and that I wanted to sculpt it to fit into the crevice between the fingers.  I had never used this form of metal before and didn't know how best to manipulate it, so I left that aspect open.  I want to make an organic form and I was told that I should utilize the immense amount of metal shavings that come from sculpting the material.

I spent multiple hours with several 60grit sanding wheels and metal burs, as well as a belt sander.  I let the project evolve as I made it  and only kept the location on the hand in mind as I worked the metal.  Here are the results.
This is the piece of stock I carved away at.  That was easier to construct than I expected due to it's minimal dimensions.
Here are my results.  I carved the piece such that the shavings could fall into the copper crevices.
The underside of the piece is curved to fit into the space between the two fingers.
I really love the interplay between the sculpted piece and the metal dust.

A Tale of 4 Rings: Day 3

Day 3: Sheet

For this ring, my original design was very structured and clean, which is what I am most comfortable with.  In my design review I was told to continue with this design but then to destroy it.  Through this process I would learn the organic forms that sheet metal takes when it is being hammered and it would free me of my need for precision and a completely planned process.  It was a terrifying and heart-wrenching task but I followed through because I felt it was important for my development. 

I constructed the ring fairly easily and quickly, and immediately upon its completion I opted to destroy it, as not to get attached.  Here are a few photos before the destruction.  Thanks to Tai for modeling so beautifully.


Below are the photos taken during the several stages of deconstructing this ring.
 The scene of the murder and the many murder weapons.
 Collapsing in the sides of the structure.
 This is while the ring still looked decent.  This is with the collapsed in sides that made it look somewhat like it was melting or sagging.
 A view from the front of the melted sides.
 I then smashed the piece directly from above.  The collapsed sides made the form fall in on itself.  It was a beautiful process that resulted in a terribly ugly form.
 I then smashed and folded the form as far as I could with the strength in my arms.  I used a clamp to hold one side while wailing on the other to help fold it in half one last time.
 At this point I did everything in my ability to take this ring down to a nugget of brass.
This was a test of my strength of will as well as my soldering abilities.  None of my seems popped though I may have lost a bit of my sanity.

A Tale of 4 Rings: Day 2

Day 2: Tube

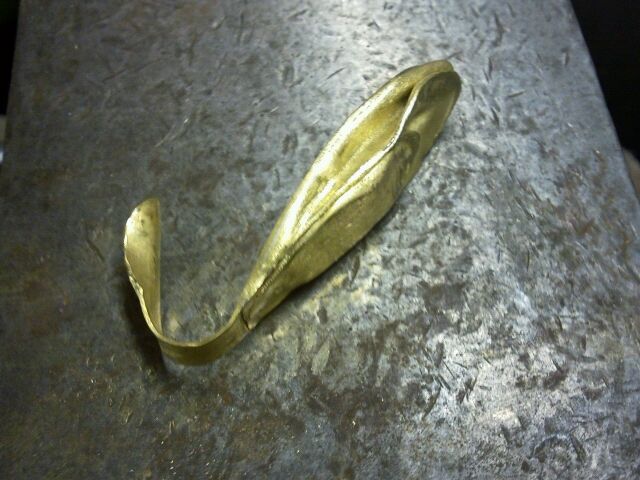
For this form I attempted to make a sculptural hand piece, utilizing a commonly structured, geometric form of metal to accomplish an organic, flowing contour.  It's very interesting to see people pick this ring up and try to figure out how to put it on without instruction.  I've seen many variations but no one has discovered its intended use without instruction.  How would you put this on?
Here is a photo of the piece in progress.  Filing the correct curve in each extended tube was extremely difficult.  If they didn't fit perfectly over the base tube there was no hope for stability in the entire piece.
This is an image of the piece pre-patina.  I discovered the magic of using Nickel Pickle to remove the copper coating from brass.
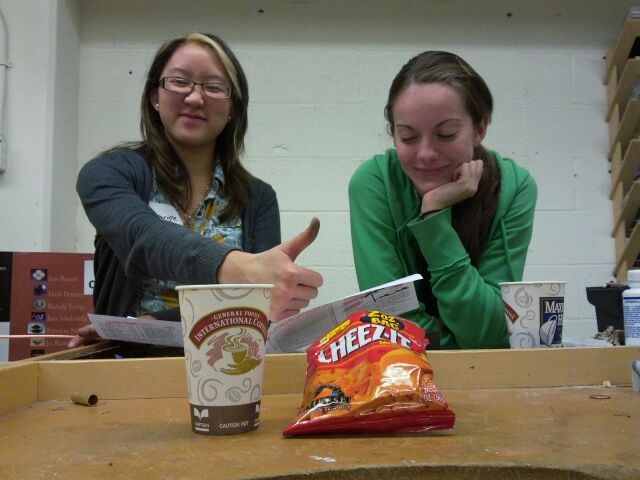
Each piece is a different size of collapsed and manipulated brass tube.  Here is an image of my studio pals, Jess and Catherine, with my late night studio dinner of vending machine coffee and cheez-its.
Below are some clearer shots of the intended use of the ring.

The base tube is designed to fit comfortably into the first joint of the fingers.  I find that the most comfortable way to wear this ring is with a fist.